Monday, August 19, 2019

Vintage tools: Millers Falls No2 hand drill.

A while ago I found a Millers Falls No2 hand drill for a cheap price on EBay so I jumped on it. For few months it was just sitting on a shelve waiting for me to wake up. The drill is in correct condition but the handle shows some dirty green paint, maybe the previous owner used it to blend his paint stock, who knows!

Can you spot the green paint on the cap?
That flowed all over the handle

I started by disassembling the drill in pieces so to clean and lubricate gears and to restore the handles.

The main wheel is in good shape, teeth are not showing any wear, just some grease gunk.

The main wheel is in good shape.

I sanded the handles so to remove that ugly green paint. I am not sure what wood has been used but there was a reddish stain below the green paint and varnish.

One handle sanded.

After cleaning handles from dust I gave them a coat of red mahogany stain.

Handles after a coat of red mahogany stain.

Following the stain I applied 5 coats of amber shellac as a finish.

The handles after their 5th and last coat of amber shellac.

After having oiled properly all gears and bearing I put everything back together.

The final result.

Now, restoration purists and tools lovers, stop reading further as what follows may hurt your feelings.

When I started that restoration I found out that the main handle was loose. The handle was retained to the drill body by a pin, and after different tries I have been unable to remove that pin without risking to damage the handle but I needed to make that handle firm on the body. To do this I used a big hydraulic crimping tool, that I normally use while making battery cable to crimp cable lugs. I selected a pair of jaws that were just a tid smaller than the handle metal ring and I crimped the handle on the drill body. While not a conventional way of doing it this perfectly made the trick and the handle is now firm to the body.

The handle crimped on the body.

This is a very nice drill and I already like it very much. It will join my No 5 in the workshop.

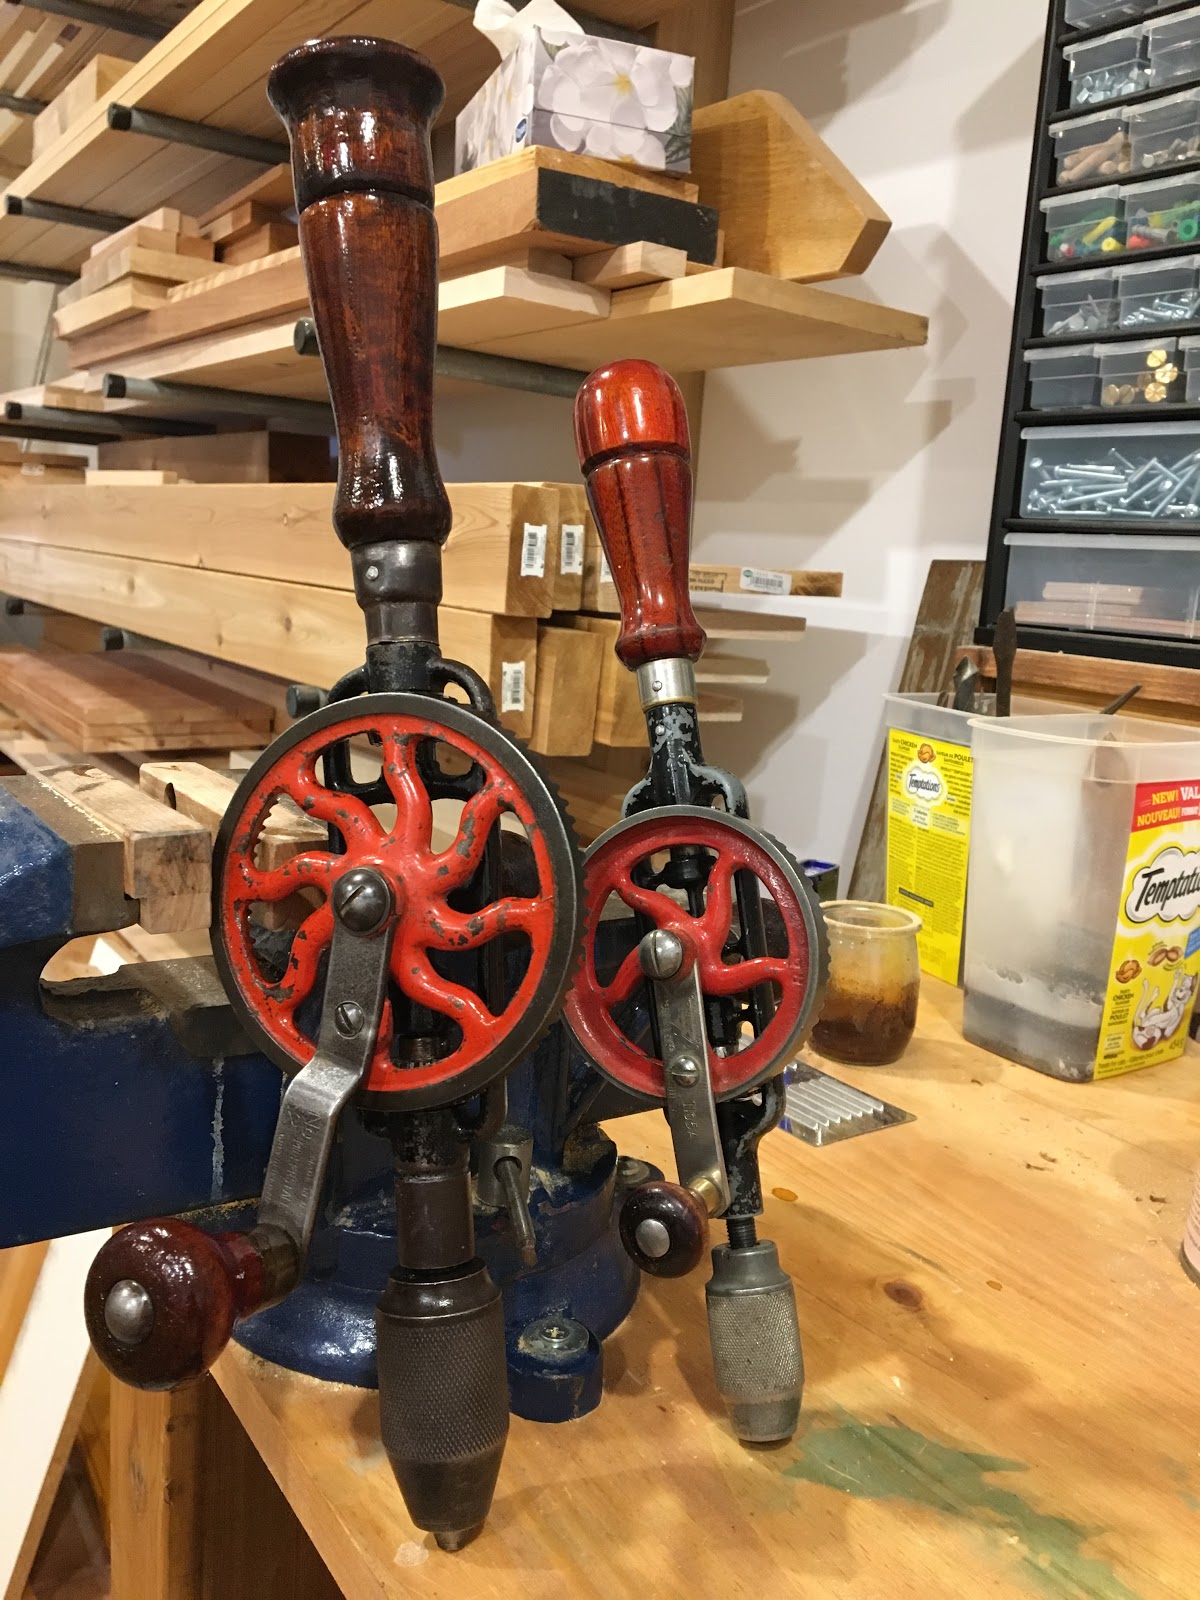
No 2 and its little sister No 5 altogether.


Thursday, August 15, 2019

Coffee table - Done

After having glued the table base, remains for me to glue all table top parts together and do the final top to base assembly.

There is nothing much to say about gluing table top parts, just that I needed to be fast to be able to assemble all parts together in one shot. So fast in fact that I did not took any picture. Anyway not much to see.

After cleaning the dried glue, I opted to simply glue the top on the base.
After short session of intimacy with some sand paper to finalize the top, the result was this:

The final result.

I like the contrast between the darker legs and lighter top.
At the end the mitered joins on the top were not too bad.

Mitered joins ended not too bad.

However some mistakes are still visible on the side.

Some gap in the join...

I created that gap while chopping out the waste. The back of the chisel pushed on the angle and crushed the soft wood... some lesson learned.
Another lesson learned is that I love cedar, I love its smell, I love how it looks... However it is a bitch to work with because of its softness and fibers, better to be sure to use very sharp tools.

I will later put few coats of boiled linseed oil on it as the final finish, but for now time for a glass of wine to test the table!


Monday, August 12, 2019

Saw sharpening - First hands on experience

Few weeks ago I got my hands on a saw vise in correct condition but since then it was resting in my workshop waiting for some time for me to set it up and play with it. This weekend was the right moment.

I don't know exactly the brand of this vise but it is very similar looking to Wentworth saw vise.

This saw vise is looking like a Wentworth.

I made a simple wood support to fix it to my workbench at the desired height, low enough to allow me to look over it if standing up and high enough so I can sit on a stool to sharpen a saw.

My saw vise setup.
Before starting anything I read a lot of things regarding saw sharpening, from different sources, included some writings from Daryl Weir from who I got some really sharp saws.

In order to play safe my first try was a rip saw as crosscut saw teeth are more complex to sharpen. I selected a Disston D8 that I got for few bucks to play with.

Looking at it, it was clear and obvious that the teeth, while in good shape, were not of the same size at all so my first step was to use a file and a Veritas file holder for jointing the saw teeth.

Using the Veritas file holder for jointing the saw teeth.
After a dozen of strokes the teeth were showing a shiny flat tip.

Jointing the teeth to the same height.
That saw got 10 tpi to I selected a 6 inches X-slim taper file to sharpen it.
To set and control the file angle I used the Veritas saw file holder.

Before starting I set the saw blade so only a minimal part was protruding above the saw vise.

The saw blade set in the vise.
I started to stroke each other teeth from right to left (so from the heel to the tip), 3 strokes per teeth. It took me around 15 minutes to reach the saw tip. Then I switched the saw in the vise and did the same to the remaining teeth. Overall it took me 30 to 45 minutes to complete the whole blade.

Not easy to take a picture of the saw teeth!
After trying the saw I am pretty happy with it but I need more practice before trying to sharpen a crosscut saw. It was a nice experience and I have a bunch of backsaws that needs to be sharpened to improve my skills, much more fun ahead.
Some lessons learned while sharpening that saw was that first I prefer to do it standing on my feet so I can look to the saw from above. Second, a small level on the Veritas saw file holder would be a great addition as an easy way to visually check that it is handled correctly.


Thursday, August 8, 2019

Coffee table - part II

After having prepared pieces for the table top as shown in my last post I needed to cut the some mortises for the final assembly.
After careful measurement I used the marking gauge to trace where the mortise will be cut as well as the center line.

Mortised marked ready to be cut.
Like before I used my hand brace to remove most of the waste so I just need to cleanup the mortises with a chisel.

My hand brace and depth stop setup.
For final sizing of the tenons I used one of my router plane, this is a very easy way to get a uniform tenon size.

Using the router plane to clean tenons to size.
A last dry fitting and the top will be ready to be glued.

Last dry fitting.
Next comes the table base. First thing to tackle was to cut all required pieces to length, so 4 legs cut from 4"x4" and 4 pieces for the apron cut from 2"x4". My miter box saw was just tall enough to cut through the 4"x4" so I used it to get a square cut.

The saw blade is just tall enough to cut through the 4"x4".
This time I had some great help to do all the cuts as my beloved wife wanted to try my miter box!

My beloved wife at work with the miter box.
To cut the tenons on each pieces of the box apron I choose not to make any kerf on the saw line to put my sawing skills to test. I must say that I have been surprised to find it easier to cut the tenons without that kerf. Following the line was quite easy.

Sawing tenons along the marked line.
For the mortises on the legs I used the usual way of removing waste using the hand brace and then cleaning the remaining with a chisel.

Cleaning mortise waste on one leg.
I started the table base assembly by gluing one leg with one apron part using polyurethane glue.

Each leg glued with a piece of the apron.
When the assembly was dry I then glued all the pieces altogether.

Table base assembly.

The base forms a 17" x17" square so the top will overhang the base by 1/2" on each side.