Showing posts with label joinery. Show all posts

Tuesday, December 22, 2020

A Story of Box and Dovetails

Last weekend was my wife birthday and instead of wasting some paper I thought about making another box to wrap her gift.

I used some Pine leftover from another project and adapted the box size to the available length. Of course the box had to be dovetailed so I thought of sharing my adventures with dovetails.

Tails or Pins, who's first?

I read enough opinions and discussions about this subject to know that there is no answer to this question but only a personal preference. Speaking about personal preference, mine is to start with tails. The reason for that, if there can be any reason, is that I find easier to cut the tails and use them as a template to mark the pins than the reverse. At the end I don't think this makes much difference if you are used to the way you choose.

Dovetail Design & Marking

When thinking about my dovetails, the first thing I am looking at is the space I will need at each end for example to hide a panel groove. 

Tails marked on one board.
If I take my box as example, the bottom will be made with a 3/4" thick board that will be joined to the box with a 1/4 tongue and groove so I needed 3/4" at the bottom to hide the groove.
I then set the size of my tails to fit the number I want and I start to mark them from each side. The central pin will take the remaining space. I like when the central pin is larger than the others, it "breaks" the visual while keeping the symmetry.

To mark the tails I use a simple pencil with a well sharped tip. After having made some mistake I am now very careful to properly mark the waste part too.

Friday, May 15, 2020

Almost there...

In my last post I started to work on the two shelves that will go in the middle and at the bottom of the vanity I am building. 

I cleaned the tenons on each board and marked them so to remember where each one was going.

Each board is marked to recall its place.

The next step was to make the mortises in the rails used to assemble the shelves boards so I marked each mortise on one rail.

Mortises marked on one rail.

I then put the opposite rail side by side and used the first one to mark the second one. This allowed me to get mortises perfectly facing each other in both rails. In case of a slight misplacement on one rail it will be reported to the other.

Using one rail to mark the other.

I chopped the mortise waste using a mortising chisel. Each mortise is 1/4" wide and 1/4" deep.

First rail done.

After about an hour of fun, both rails were done and I was able to clean the boards for the first dry fit.

First shelf dry fit alone...

... and in its final place.

One more shelf to go and one more hour of fun and I was able to see the final result.

Both shelves in place.

Now that all parts are done I will be able to tackle the last adjustments and cleaning then will finish parts before final assembly.


Friday, December 27, 2019

Playing with dovetails

During Christmas we waste a lot of packaging and paper to wrap gifts that are unwrapped in a second. This year I wanted to do something different and as I have some time to kill waiting for successive finish coats to dry on my main project, I decided to play with dovetails and make a wooden box to wrap my wife gift.

First I never made any dovetail before so this was my first try and I was not expecting anything perfect. I have not much problem to saw to a line if I am careful enough so I grabbed some wood offcut and gave it a try.

I used some pine wood for that box, first because I love pine wood and second because I had some left over of the almost exact size I needed. After cutting all pieces to length I started to mark down my tails. I used a sliding bevel and set it to a 1:6 factor and marked the dovetails with a pencil.

I then cut to the line with my saw and cleaned the cut with a chisel. I do not have any pic of all the process as I did not think about it but anyway it is usual enough not to be illustrated.
I used the tails to mark the pins, cut them and clean all the cuts.

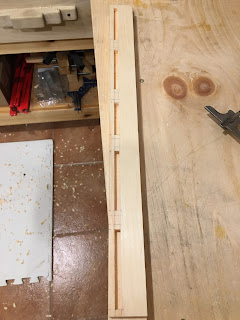
Bottom of the box is set in groves cut on each side. The side groves are easy to cut with a plane as they are covered by the pins on the front and back panels. I also cut groves in these panels but using a chisel like for a mortise as they are stopped groves not to show on the side.

I ended with the following assembly:

Side panels and bottom.
Same disassembled


The top cover is sliding in groves the same way the bottom is set. The end result is the following.

Almost done!

I carved a recess on the top of the cover plate so to be able to grab it.
Back to the dovetails... I did not find much more difficult to cut a dovetail than a tenon and mortise. However I did some mistakes. The main was to cut on the wrong side of the waste (shame). I did not mark the waste and was distracted listening to some documentary so the result was immediate, lesson learned.

I finished the box using bees wax and I am pretty happy with the end result.

A reusable gift packaging...


... made of pine wood, elbow grease and bees wax...


... showing less than perfect dovetails but still!

This is taking more time than to wrap a gift in a piece of useless cheaply decorated paper but this is reusable, nicer and also this is so much much more fun!


Monday, December 9, 2019

A Range of Tongue and Groove Joinery.

Pursuing the work on my TV stand project, I had time during the weekend to work on the middle shelves section. This section will form a box with a middle shelf and a bottom board will close the box and be lower shelf. That box inner dimensions will be 10"1/2 deep, 14" high and 16" wide to be able to store a TV cable receiver and DVD player.
The first thing to tackle is to dimension the required pieces as follow:

  • 11"1/2x14" boards (2) as the two side panels.
  • 16"1/2x14 board as the back panel
  • 11"1/2x16"1/2 board for the middle shelf.

As I want a straight cut and the board is too wide to fit properly on my miter box, I set a fence using a scrap piece of wood and a clamp and used the long backsaw from the miter box to make the cut.

Using a fence to cut straight...
...and using the long backsaw.

I check the cut from squareness and cleaned the end grain using my low angle block plane.
 
Considering its dimensions, the back panel is made by assembling two 7"1/2 boards with a 3"1/2 board. The assembly is done using standard tongue and groove joinery, 1/2" deep, made using my Record 50. 
I started by making the tongues on each of the 7"1/2 boards.

Using the Record 50 to make tongues and grooves.

I then made the grooves on each side of the middle board and added side beads.

Dry fit of the back board assembly.

Next is to glue up the assembly. In theory I do not have to glue it as it will be seated between the two side panels but as the back panel will support the rear leg I prefer to glue it so to make it stronger.

Gluing the back board assembly.

This back panel will be set in a rabbet made at the rear of each side panels and the join will be reinforced with dowels. I used my Record 778 to make the rabbet on each side panels.

Using the Record 778 to make the rear rabbet in each side panels.

That plane is cutting very well and the fence having two rods it does not tend to move like is doing my Craftsman plane that have only one rod. I still need to practice though as I have the tendency to slightly shift down the plane on the left side resulting in a tilted rabbet.

The middle shelf will be set in a dado made in each side panels too. First I noticed that the shelf board is slightly cupped so I used my wooden Peugeot plane to get it back to flatness.

Using my wooden Peugeot plane to flatten the middle shelf.

This plane is truly amazing. It rides on wood so smoothly and its iron cut like nothing else. The board has a big knot on one side and this was nothing to plane. The iron cut through the knot as smoothly as through butter and without a hick up. 
Flattening the board reduced its thickness to 11/16 so I need to take this in account when making the dado.
I used a marking knife to mark where to make the dado on the side panels, then used a chisel to make a kerf on the inside face of the dado. I then used my Record 42 shoulder plane to start the dado cut while tilting it.

Using the Record 42 shoulder plane to start the dado cut.

When I reached the bottom on each face of the dado, I switched to my router plane to finish the cut.

Switching to the router plane to plane the dado's bottom flat.

Finally using a chisel I cleaned the corners and I was done.

A clean dado.

Time to try a dry fit of the shelf to check if I did it right (or wrong).

The shelf fit...


... pretty good fit.

That is all for today. Next will be to make tongues and groves so to assemble the box with the face frame, to drill the holes for the pegs and to assemble every pieces altogether.
I am thinking to first finish each piece before assembly as it would be easier to apply stain and shellac on each piece than on the fully assembled body. 
My plan for the finish is to apply and sand a coat of white shellac to seal the wood and prevent blotching, then a coat of stain, then few coat of shellac and finally to wax the whole to get a nice sheen. 


Monday, July 22, 2019

Weekend exercise: mitered bridle joint

This weekend my wife asked me for a small low coffee table to be used outdoor on our fire pit deck space. More than a coffee table I guess it will be mainly used as a wine table.
The table will look more or less like this:

Wine table first draft.
For this project I choose to use some western red cedar, first because it holds well outdoor but also because I like the way it looks. The table top will be composed of a square frame made with 2"x4" enclosing a center part. The legs will be made with 4"x4" and the box apron again with 2"x4".
Overall dimension will be a cube of 18"x18"x18".

So I started by a challenge to myself and took the opportunity to test my skills (if any) by creating the top frame using hand cut mitered bridle joints. It will be the first time I try to make these fully by hand and I am not sure about how it will go or how much easy (or difficult) it will be, especially that red cedar is not the easiest wood to work with. It is quite knotty and very soft so without sharp blades it is crushed more than cut.

After having cut four 18" long pieces for the table top frame, I started to work on the tenoned parts. I marked the 45 degrees angle as well as the tenon thickness on both sides and ends. I then used my Stanley miter saw to carefully make the 45 degrees cut on each sides.

Cutting a 45 degrees angle.
I was very careful to not cut past the correct depth so not to damage the tenon.

Often checking the depth of cut.
Being right handed I used a C clamp to hold the board while cutting the opposite angle.

Using a C clamp to hold the board.
The Stanley miter box made a nice and clean cut right on the line.

Clean cut.
Next step was a bit more difficult, this was the first time I tried to cut the angled tenon using a tenon saw.

Cutting tenon using the tenon saw (obviously).
That tenon saw blade was just high enough for the cut.

First side cut, not perfect but not too bad.
... and both sides cut.
Not perfect, the tenon is a bit narrower at its
base and will need adjustment


After a bit of cleanup of the cut with my chisel and shoulder plane I got a first piece done.

First part done, 3 to go.
After the second tenoned frame part I started to tackle the corresponding mortised parts. First step was to cut the two pieces to length with 45 degrees angles on each end. There again I used the miter box.

Two pieces cut to length at 45 degrees.
After having marked the mortise I used my tenon saw to cut each side of the mortise.

Sawing each side of the mortise.
For the first piece I used a chisel to chop out the waste, it was quite time consuming and not very clean in that soft cedar.

Using a chisel to chop out the waste.
For the second piece I used my coping saw to cut out most of the waste and only had to chop the last remaining. This was much much quicker than chopping out everything with a chisel.

Now that all frame parts are cut I did a quick dry fit to see the result of my little exercise.

Dry fit, not too bad but far from perfect.
I will need some more work on these joints...
At first sight the result was not too bad but not perfect either. Two of the joints are acceptable but two of them are really not good. I will need some rework to make these tighter. This will come later on but for now I need to tackle the central part of the table top.
I changed my mind since I started. The initial plan was to make a plain central part with board assembled using tongue and groove. Finally I opted to use boards with 1/4" space between them. As this small table is meant to stay outside, the space between the boards will allow any rain water to drain.

I started with a 5"1/2x1" board. I needed to cut two length of 13" and to re saw them in two.

Re sawing the board in two with my Canadian Disston.
 After a bit of planning I ended with 4 boards, each being 13" long and 2"7/16 wide. Each will be spaced by 1/4" and will have a 1" tenon at each end, what will give me a 11"x11" square in the middle section of the table top.

After cutting the tenons I finally got all my parts ready for fine tuning and assembly.

All table top parts ready for fine tuning and assembly.
Next I will need to assemble the top and work on the legs and box apron.