Showing posts with label projects. Show all posts

Tuesday, November 15, 2022

Finalizing the greenhouse

Last winter I left my greenhouse in an unfinished state as snow was coming, so I covered it and it stayed that way for winter:
Ready for winter.

Not a very glamour look but this was all I had time to do before freezing hard for 5 months.

When spring came it was time to pursue the adventure, quite some work to do. First step was to build the interior workbench and shelves.

Building the interior, part 1.


I added a sink at the back of the greenhouse so to clean tools and have easy access to water. I recycled an old sink that was unused and sitting in my basement and an old faucet removed from my boat.

Add water to the mix.


The faucet with red handle is to connect a watering hose. The sink hole will go direct under the greenhouse as it is only water with no chemical.

So after adding one shelf on each side and some hanged boxes on the wall I am done with the interior.

Finished interior.

The longer job was to build the windows. With 10 windows to build, 2 battens each it was quite a long run. I had to size the stock, do the assembly and install each of them but I got there, and I am pleased with the result even if not tinted yet.

All windows set.

The last step will be to build and install the door, hopefully before snow catch me again, but this will be the subject of another post.

Wednesday, March 30, 2022

Bathroom vanity done

Finally it is there and done. After long delays due to other priorities I am finally done with my bathroom vanity and got it installed yesterday.

This was a long run but it looks good to my eyes and more important my wife is happy about it!


Now it is time to my next project, door and windows for my greenhouse, 1 door and 10 windows to build, a lot of fun ahead!


Thursday, November 25, 2021

A story of greenhouse


Long time without any post as I have been very busy this summer, working on my boat renovation, my garden and so on. But now is a new post about some kind of woodworking, building my greenhouse.

It has been a while that my wife ask me for a greenhouse to start our seeds as well as working on flower pots, grow greens etc... So it was time to get to work and build it.

As with anything else I first made some plans of what I want to build with all the needed measurements and calculated sizes.

So here are the plans I started with:


The side walls, 10 feet long...

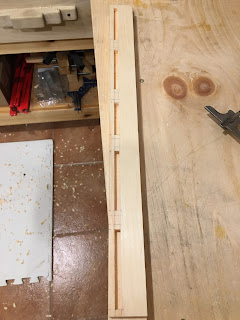
...the roof trusses...

...and the front.

The greenhouse will be 10' by 8' and is to be fixed to the side of the existing shed so the first thing I started with was to remove the shed vinyl siding and replace it with ship lapped boards. I had much pleasure doing this by hand and added a nice bead on each board, just because I could. AT the end I will cover all my shed that same way but this is another story.

Starting with the greenhouse itself, first thing to tackle was to install the base, made of 2"x6", supported by concrete blocks, and covered with 3/4" thick plywood.

I then built the two side wall by assembling 2"x4", nothing very fancy. The walls are screwed to the base.


The base and side walls up.

Different view angle.

The lower part of the wall are to be closed by shipped lapped planks while the upper section will receive the windows. Windows are 42" high and will be made with acrylic panels set in wood frames.

I spent the following days to build the roof trusses using 2"x4", screws and metal plates. I know that this is not fine joinery and I wish I had the time to build the trusses using tenons joinery but clock is ticking and there is not much time left before winter knock at our door.

Roof trusses.

Before starting to install the trusses I had to make the front side and paint everything.

Front side...

...note the horizontal 2"x6" to separate bottom siding.

I then installed the bottom siding. Took me few days to cut and prepare all the boards. For this I used 2"x6" too. May look a bit oversized for a siding but as this part will be in contact with snow every winter I wanted something strong.

Bottom siding installed on one side...

...and on front side.


I then installed the trusses fixed to the wall using metal plates and joined together by 1"x3" purlins.
The roof is made of polycarbonate corrugated panels.

Trusses, purlins and roof installed...

...front view.

I left the purlins longer as I did not know exactly where the roofing panels will ends. I will saw off the extra length later on.
For now this is all I can do as we expect our first snowfall tomorrow. I will temporarily close all the openings with poly tarps for winter. I will build the windows and the door in my workshop during the winter season and will install them in spring when snow will have melt. I will then also build shelves and workbench inside the greenhouse.


Tuesday, January 5, 2021

Another box

Following one of my previous post the last part of my box to be done is the cover and handle. The cover is a simple pine board but I wanted the handle to stand out of the box so I used a piece of mahogany to make it.

I started with a small 11/2x5x1/2 mahogany piece that I marked to cut each end round. I then roughly saw the corners and got the final round shape with a chisel.

Rough cut with a saw...
...final shape with a chisel


I then rounded the edge, first using a plane to get a bevel all around then sanding the remaining waste.

First handle part done.

I did the same for the second part, except that I started from a 1x41/2x1/2 piece of mahogany that will only be half rounded on its edge.

Two parts done.

The handle is made by gluing the two parts stacked.

Handle final shape.

I applied 4 coats of wiping varnish, by penetrating in the wood it highlights the reddish color of the mahogany.

Handle afixed to the box.

The handle is set to the box using four small wood pegs dark stained. The little wood pegs are protruding 1/16" from the top of the handle to give a "nailed" look.

Overall I am pleased with the end result. The handle could have been a bit more evolved in its shapre or better designed but I like the way it stands out from the box.


It was initially planned to be used to contains my wife birthday gift but as usually I was late so it became another gift by itself.


A simple box


Friday, May 15, 2020

Almost there...

In my last post I started to work on the two shelves that will go in the middle and at the bottom of the vanity I am building. 

I cleaned the tenons on each board and marked them so to remember where each one was going.

Each board is marked to recall its place.

The next step was to make the mortises in the rails used to assemble the shelves boards so I marked each mortise on one rail.

Mortises marked on one rail.

I then put the opposite rail side by side and used the first one to mark the second one. This allowed me to get mortises perfectly facing each other in both rails. In case of a slight misplacement on one rail it will be reported to the other.

Using one rail to mark the other.

I chopped the mortise waste using a mortising chisel. Each mortise is 1/4" wide and 1/4" deep.

First rail done.

After about an hour of fun, both rails were done and I was able to clean the boards for the first dry fit.

First shelf dry fit alone...

... and in its final place.

One more shelf to go and one more hour of fun and I was able to see the final result.

Both shelves in place.

Now that all parts are done I will be able to tackle the last adjustments and cleaning then will finish parts before final assembly.


Tuesday, April 28, 2020

Vanity taking shape

Now that the raised panels for the vanity side are done I did start making the frame that will receive them. I first cut the four legs to length and planed them square to 11/2 x 11/2.

Two of the 4 legs.

The side panels are set in a groove made in each leg. To make this groove I used my small Record #43 plough plane.

Making the grooves.

However, as it can be seen in the picture above, the groove is stopped at a point in the leg. To be able to use the plane I had to make the groove end using a chisel first so the plane can work for the remaining waste.

The end of the groove is first made with a chisel.

After having made the matching tenons and grooves in the top and bottom rails I was able to do a dry fit of each side of the vanity.

The two sides of the vanity.

I then tackled the rails for the front frame and matching mortises in the legs and was able to dry fit the base vanity assembly.


Base assembly dry fit.

I did the same for the bottom rails and did another dry fit with the doors inserted.

Another dry fit with doors inserted.
The next thing to take care of are the two shelves. These two will be made with separate boards assembled with tenons in rails mortises.

The two shelves will be made with separate boards.

The middle (darker) board is birch, like the raised panels while the other ones are pine.
I am not sure yet what will be the finish for this vanity. My initial idea was to stain the pine dark and keep the birch natural. Now I start thinking that I like the contrast of clear pine and natural birch. I will think about it over night to get some inspiration :)


Monday, April 27, 2020

Big slab planing and a drama (sort of).

Long time since my last post. We just came out from 3 weeks of vacation (at home of course) that we spent doing some long due home renovations.
Still I took the opportunity of the nice weather coming back to start planing some big slabs of white pine to prepare them for the bench I want to build. It is a joy to plane outside under a shining sun!

Start planing the slabs.

This was also the opportunity to play with the latest tool I got, a Millers Falls #88 jointer plane fence. I got it in perfect shape, it just needed a bit of cleaning and was ready to be back to work.
I mount it on my Stanley #7 and used it for the first time. At first it was a bit strange to use but when I got used to it I found it nice. With this, it is easy to follow a long straight edge.


Trying my Millers Falls #88 jointer fence.

After a while, and a bunch of shavings, it was time to clean up the deck a bit.

Time for a good sweep to collect the shavings.

And then came the drama... My Stanley #7 was resting peacefully on the slab when I heard a big "bang"... the plane felt down on the deck. The result was immediate:

Resulting effect of a fall.

I was lucky enough that my deck was made in wood so the shock was not too hard on the plane sole and the only damage was a broken tote and a slightly bent threaded rod.
It was easy to get the rod back straight. For the tote I used epoxy to glue it back in one piece.

Tote glued back in one piece.

After slight sanding and a coat of finish, it will be almost as new.

Anyway, lesson learned: When the job is done, put the plane back to its shelf!


Wednesday, April 1, 2020

Making laminated raised panels

After making the doors for my bathroom vanity I need to make side panels of the same type that is to say that these panels will have a pine frame enclosing a birch raised panel.
Considering the size of these side panels I needed to make the birch panels by jointing two 6" wide boards. I cut the boards to length, adding 1" for the tongues, and planed the edges with a jointer plane.
After a quick dry fit I started gluing the panels.

Jointing boards.

At the end I got two 11"x165/8".

Jointed panel.

In order to make the raised center I needed first to cut the tongue all around the panel and then to plane the raised bevel. I started by marking the boards.

Board front face marked...
...and same for the back face.


On the front face, the first mark is the tongue, the second is the end of the raising bevel. On the back only the tongue is marked.

Using my favorite rabbet plane, my Record 778, I started planing the tongue cross grain.

Starting the tongue cross grain on the back.

Then went with the grain to get it done all around. The tongue is 1/4" deep and 1/2" wide.

One face done.

When the back face is done I did the same to the front face.

Both faces done.

The remaining step was to plane the 1" wide bevel from the tongue to the marked line.
To plane the bevel, this time I used a Millers Falls #8 to remove the bulk and finished with my shoulder plane.
I ended with my two side raised panels.

Rough planed side raised panels.

Next I will start finishing these panels and will work on the frame.