 |
| Ready for winter. |
Not a very glamour look but this was all I had time to do before freezing hard for 5 months.
When spring came it was time to pursue the adventure, quite some work to do. First step was to build the interior workbench and shelves.
 |
| Building the interior, part 1. |
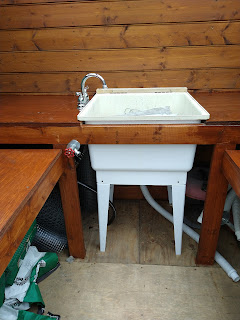
I added a sink at the back of the greenhouse so to clean tools and have easy access to water. I recycled an old sink that was unused and sitting in my basement and an old faucet removed from my boat.
 |
| Add water to the mix. |
The faucet with red handle is to connect a watering hose. The sink hole will go direct under the greenhouse as it is only water with no chemical.
So after adding one shelf on each side and some hanged boxes on the wall I am done with the interior.
 |
| Finished interior. |
The longer job was to build the windows. With 10 windows to build, 2 battens each it was quite a long run. I had to size the stock, do the assembly and install each of them but I got there, and I am pleased with the result even if not tinted yet.
 |
| All windows set. |
The last step will be to build and install the door, hopefully before snow catch me again, but this will be the subject of another post.

Good job. Plants looks happy inside. How are you planning on venting ?
ReplyDeleteBob
Plants will be even happier now that they have real windows :) For venting I was planning to add some fans in the "triangles" above the entry door that would be triggered by a temperature sensor. Now with 10 windows, all that I can open, I am questioning if it is necessary or not to add fans. I may be tested this next summer and see.
Delete