Tuesday, December 29, 2020

Anatomy of a Peugeot plane

Few days ago, I received an email from Simon living in Netherlands about the dimensions of one of my Peugeot plane. Simon got a Peugeot blade assembly and wants to build the plane that goes along. So I made some pictures and drawings with measurements and here is the anatomy of a Peugeot plane.

Introduction


Peugeot 48


The plane is a Peugeot 48 (what is also the blade width measured in mm) and is made with Cormier wood (French naming) or Service Tree in English. For the naturalists, its scientific name is Sorbus Domestica.

Its length is about 93/8 inches (or about 238mm) what makes it a smoother plane.

Its particularity is the mechanism to move the blade.

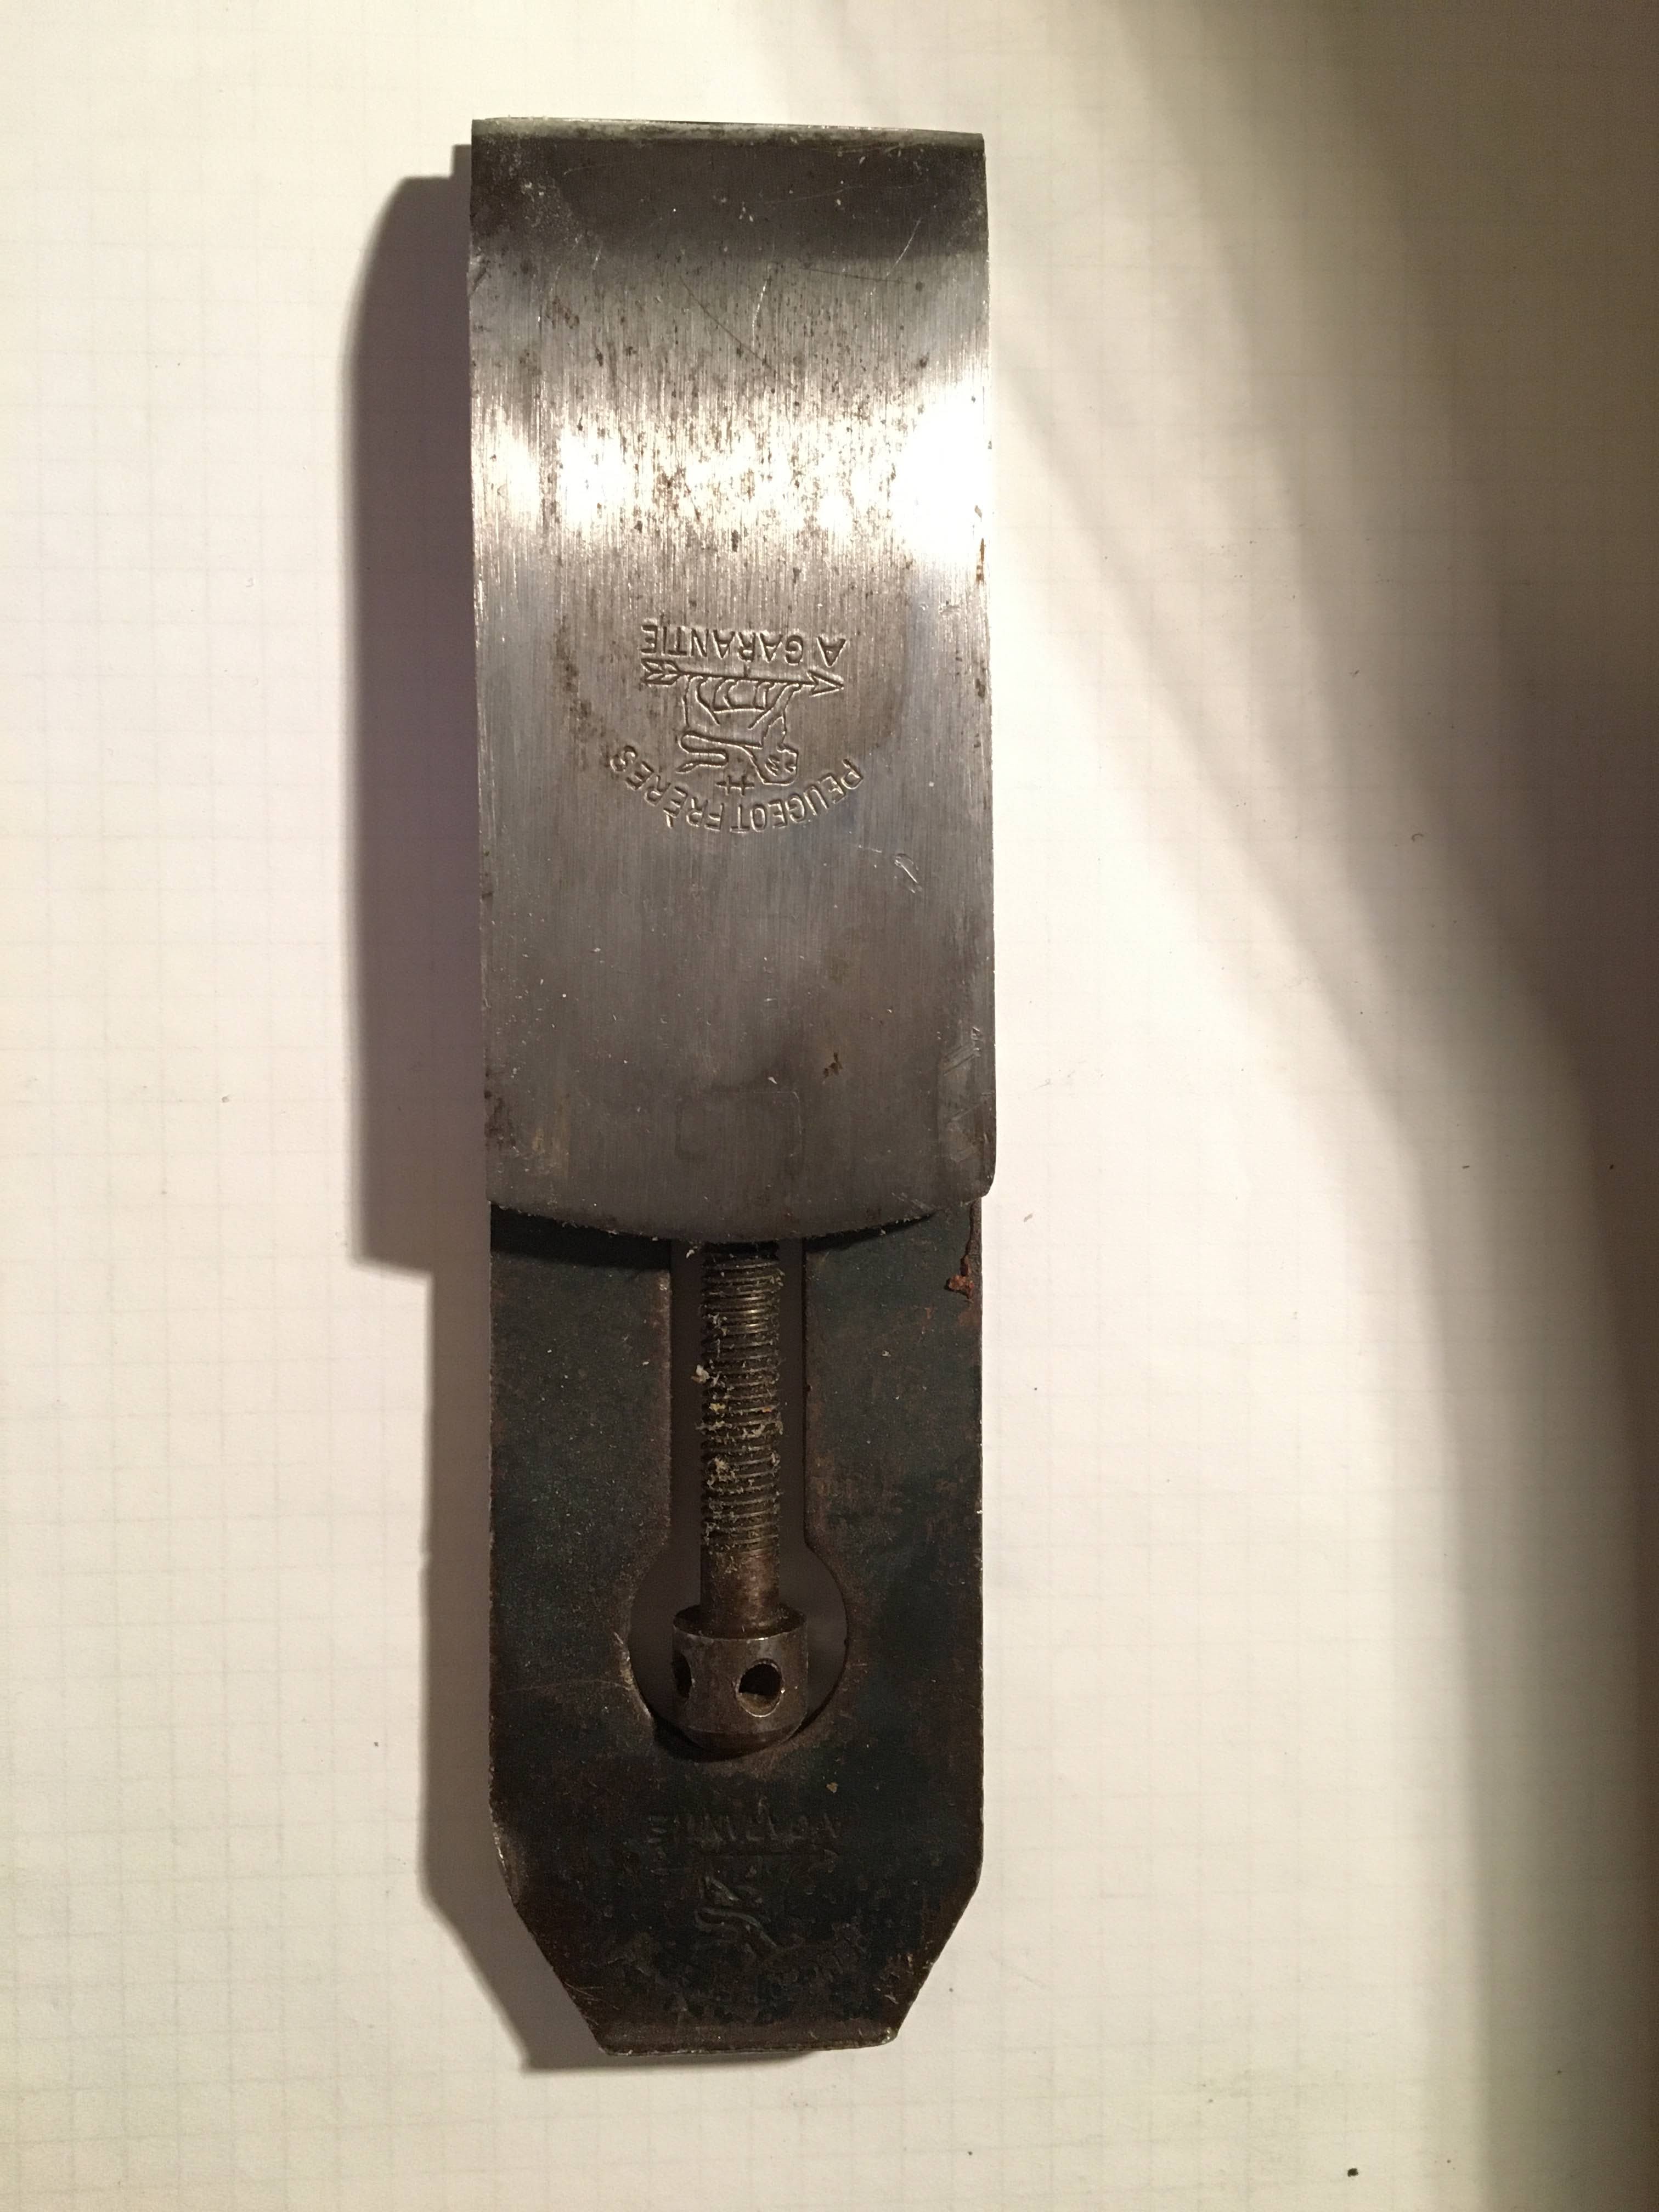
Blade assembly, top view
Blade assembly, side view


I tried to be as precise as possible in my measurements, in inches as well as millimeters, but there may be some small deviations.

Side view

The picture below shows the side view of the plane wooden body (blade assembly and wedge removed).

Plane body, side view.

Below is a drawing with all the dimensions I was able to measure.

Plane body side dimensions.

One thing that surprised me is the 80 degrees angle of the front side of the mouth that I believed was vertical but is not.

Top view

Below is a picture of the plane body top view.


Plane body, top view

Note the notch in the blade bed that receives the adjustment screw mechanism.
Below are the corresponding dimensions on a drawing.

Plane body top dimensions

About the wedge

Below are two pictures of the plane wedge. Sorry for the shadow but I have no professional studio light so this as the best I could do.

Wedge, top view
Wedge, side view


Finally below is a drawing of the same views with the corresponding dimensions.

Wedge dimensions

Hope this will help, and if anybody is making a clone of it, please send me a picture.

Tuesday, December 22, 2020

A Story of Box and Dovetails

Last weekend was my wife birthday and instead of wasting some paper I thought about making another box to wrap her gift.

I used some Pine leftover from another project and adapted the box size to the available length. Of course the box had to be dovetailed so I thought of sharing my adventures with dovetails.

Tails or Pins, who's first?

I read enough opinions and discussions about this subject to know that there is no answer to this question but only a personal preference. Speaking about personal preference, mine is to start with tails. The reason for that, if there can be any reason, is that I find easier to cut the tails and use them as a template to mark the pins than the reverse. At the end I don't think this makes much difference if you are used to the way you choose.

Dovetail Design & Marking

When thinking about my dovetails, the first thing I am looking at is the space I will need at each end for example to hide a panel groove. 

Tails marked on one board.
If I take my box as example, the bottom will be made with a 3/4" thick board that will be joined to the box with a 1/4 tongue and groove so I needed 3/4" at the bottom to hide the groove.
I then set the size of my tails to fit the number I want and I start to mark them from each side. The central pin will take the remaining space. I like when the central pin is larger than the others, it "breaks" the visual while keeping the symmetry.

To mark the tails I use a simple pencil with a well sharped tip. After having made some mistake I am now very careful to properly mark the waste part too.