
The last thing that I needed to tackle before starting the final assembly was the rear leg. The leg will be set using a tenon in the central part of the stand and at an angle (12 degrees from the vertical) so the joinery need to be done at the right angle.
I first cut the leg to the right angle then cut the tenon and cleaned the shoulders. This was easier than I expected.
 |
| Angled tenon |
I then applied the shellac wash coats, stain and wiping varnish on the leg.
While the rear leg finish coats were drying I made few keys that will be used to bind the stand base and the top. I used a scrap of birch (Yellow Birch or Betula Alleghaniensis to be precise) for these keys.
 |
| The five keys used to bind the top to the stand base. |
The top will be bound using 5 keys, 3 on the front and 2 at the rear.
 |
| One key in place at the rear of the front apron. |
Each key will go in a small notch at the rear of the front apron and rear enclosure so no key will be visible.
 |
| The key is going in a small notch. |
This done and all the finish layers applied and dried on the different parts, I started with the final assembly.
The first parts to be assembled were for the front face...
 |
| The front face assembly. |
...I then added the rear shelves enclosure...
 |
| Dry fit of the rear shelves enclosure before gluing. |
...then came the two front legs...
 |
| Two front legs assembly. |
...the bottom shelf...
 |
| Bottom shelf assembly. |
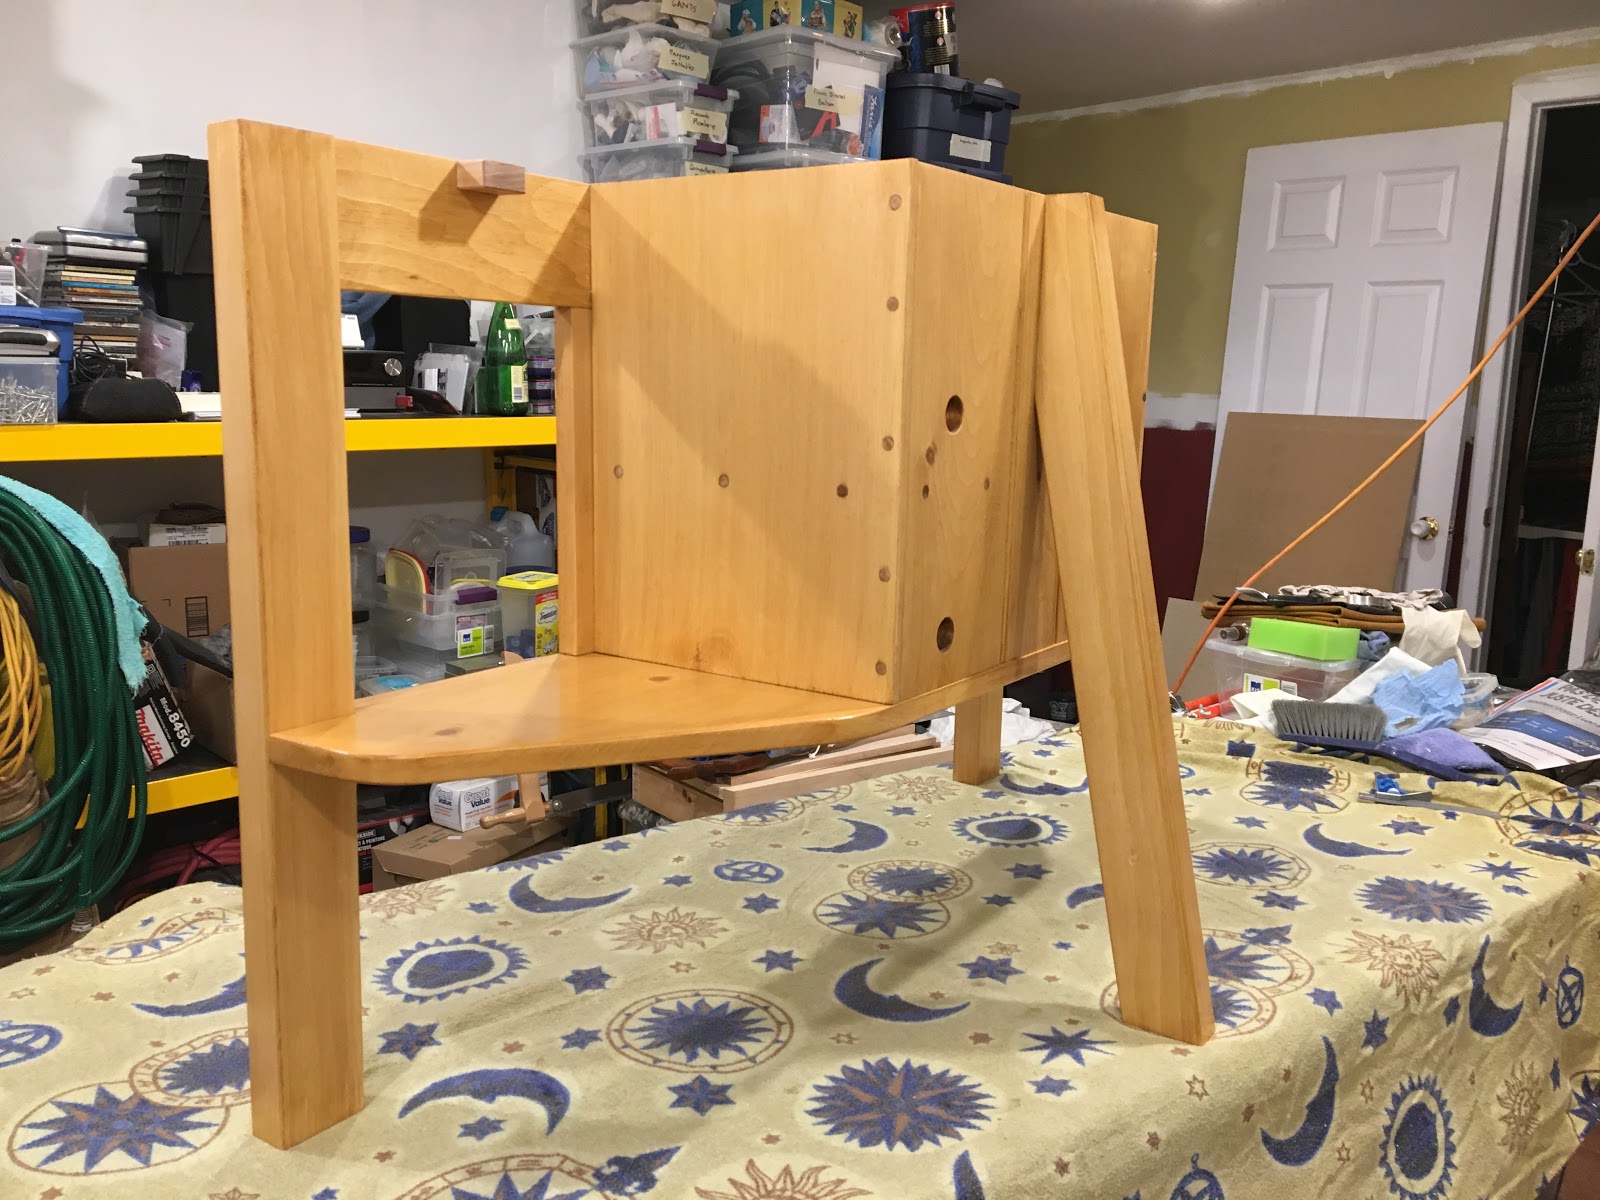
...and finally the rear leg.
 |
| Rear leg assembly. |
On the previous picture are visible the wooden dowels used to reinforce the shelves enclosure assembly. For the bottom shelf I used some screws in the enclosure as this will not be seen except if you crawl below (but I used brass wood screw so even if you crawl below it will still look nice).
This ended the stand base construction and the final result, minus the top, is shown below.
 |
| TV stand base front view... |
 |
| ... and rear view. |
The last thing I need to do now is to cut the top board to size and finish it properly.
Before starting with that last cut I want to build a sawhorse that as I do not feel comfortable to saw such a piece at wrist or hips height. But this will make another story...
I like it, good job.
ReplyDeleteI'm sure it will be appreciated
Bob
Thank you Bob, this has been a great source of learning. For example after all my tests I am pretty happy about the finish coats to avoid blushing.
DeleteI can't remember what you used to pre-finish the face frame, but it really looks good. Nicely done!
ReplyDeleteThank you Matt! For the finish I did the following:
Delete1. 3 wash coats of diluted shellac (25% amber shellac, 75% white shellac, the mix diluted 50/50 with alcohol) wipe with light sanding between coats.
2. 1 coat of oil stain made with natural product (mainly nuts oil).
3. 3 coats of homemade wiping varnish (1/3 LBO, 1/3 Turpentine, 1/3 Varnish) with steel wool rubbing between each coat.
Last thing that will remain to be done is to polish it a bit with some bees wax.