 |
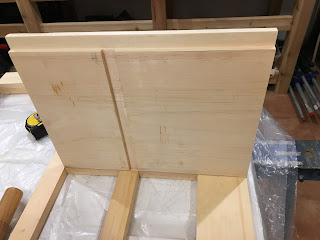
| Grooves at the rear of the face frame. |
Here the grooves are stopped where there is some tenon joinery. I made tongues on the side panel in the same way.
 |
| Side panel assembly. |
I then did the same to the middle shelf and I was able to do a quick dry fit of the whole assembly.
 |
| A quick dry fit, view from the top... |
 |
| ...and from the bottom. |
Next was to bore all the holes that will be used to reinforce the side and back with pegs. I first marked the hole centers.
 |
| Holes marked in the middle of a dado. |
I then used an hand drill to make small pilot holes.
 |
| Making pilot holes. |
I then used a hand brace to bore the peg holes.
 |
| Boring the peg holes. |
I repeat this on all parts and called it done.
After having done most of the parts, I was able to clean some pieces and start the assembly. I began with the central muntins and rail.
 |
| Central muntins and rail glue up. |
While the glue was drying, I took care of finishing the shelves interior. I used a shellac mix as a wash coat to try to avoid blushing. The mix is made of 1 part of amber shellac, 3 part of white shellac, the whole diluted 50/50 with alcohol.
 |
| My shellac mix used as a wash coat. |
I mixed a part of amber shellac as after some trials I found out that it highlights a bit more the golden aspect of pine. Too much of amber shellac and the wood turns orange though. After light sanding I applied two coats of that mix. For each coat I brushed the shellac on then wiped it off so there is no build up.
 |
| Wash coat applied. |
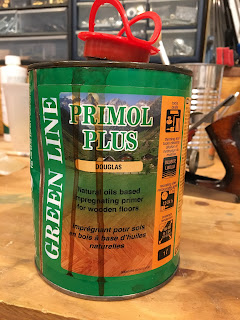
After leaving it to dry for the afternoon, I again sanded lightly with 220 grit and I applied the stain. The stain I used is made of natural components like nuts and is oil based.
 |
| The stain I used. |
 |
| Stain applied with a brush. |
I then wiped it with a clean cloth.
 |
| Stain wiped off. |
I like the result, not much blushing (but still a bit though maybe a third wash coat would help) and the final stain is exactly what I needed.
I left this to dry overnight. The day after I applied the first coat of finish. I was initially planning to use shellac for the finish but changed my mind (again) and will be using wiping varnish and wax.
I made my own wiping varnish by mixing oil based varnish, BLO and turpentine in equal part. I used a clean rag cloth rolled as a ball to apply it.
 |
| First coat of wiping varnish left to dry. |
I will leave this to dry overnight before applying a second coat. For the shelves interior two coats will be enough as this will not be exposed much to sight.
While the wiping varnish was drying I tackled one of the last part I needed to make, the lower shelf.
The shelf will have a form similar to the top form. I marked the board and did a rough cut with the saw.
 |
| Lower shelf rough cut. |
I then planed the cut clean and used a chisel to carve the curves.
 |
| Carving the curves. |
When the whole profile was done I lightly sanded the round part. I then needed to plane a tongue where the shelf will be assembled on the face frame.
 |
| The tongue used to join the shelf with the face frame. |
 |
| The final result. |
Few things are left to be done and it will be mostly a matter of some adjustments, applying finish and glue everything in place.

That's a lot of progress. You know it's a good project when you have three squares on the bench at the same time (picture 4)!
ReplyDeleteMatt, I am a lazy guy so I don't like to change square settings all the time and use many of them :)
DeleteLionel I had to read the post 3 times to digest it all. The joinery for a tv stand is over the top. I can't wait to see it put together.
ReplyDeleteRalph, I have the bad habit to over engineer a bit everything lol
DeleteIn impressed, making great progress.
ReplyDeleteIm, with you on that. Over engineer and over built everything is my motto :-)
Bob
Thank you Bod, too much honor! From now on it will be more about finishing and assembling everything. 1 week left, hopefully this will be ready on time :)
Delete