Last time the miter box base was ready and was only missing some hardware like tie rod, length stop etc.
I opted to work first on the saw as I am eager to see it back on the base. After the tote has been removed, the first step is to clean the blade.
The blade was not very rusty, just surface rust and oxidation but needed a good cleanup. The teeth are quite sharp what means that this saw has barely been used. To clean the blade I used a rust remover that I generously applied on the blade.
 |
| The rust remover applied on the blade. Nice green slime. |
After 30 minutes I rubbed the green slime with 0000 steel wool, wiped it with rag and rinsed it with water. This product gives really good result and dissolve the rust incredibly well. Only drawback is the green die it contains, it makes nasty stains, better to wear gloves!
 |
| I swear next time I will wear gloves so I won't look like Hulk |
After this treatment I rubbed the blade with WD40 and 600 grit wet sandpaper .
Blade cleanup revealed the lovely Stanley Sweetheart etch that I wanted to preserve. Hopefully I will be able to make stand up a bit more.
Blade cleanup revealed the lovely Stanley Sweetheart etch that I wanted to preserve. Hopefully I will be able to make stand up a bit more.
 |
| Faint Stanley Sweetheart etch |
The next step for the blade will be a good polishing using some metal polish paste.
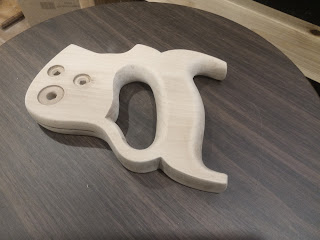
For now time to switch to the saw tote. I sanded it t bare wood and stained it. I opted for a red chestnut tint that gives a nice reddish brown color.
 |
| The tote sanded to bare wood. |
I left it dried for 10 minutes I wiped it with a clean cloth. I will let it dry for a day before applying a mix of linseed oil and turpentine.
 |
| Stained tote. |
Waiting it to dry I started to make a replacement for the sacrificial board. I used a scrap piece of Larch wood, a left over of some flooring I made at home.
I planned the tongue and grove and gt the exact size of the original board. I then sawed and chiseled the little notch on each side to leave space for the front upright of the box.
 |
| Carving the notches for the front upright. |
I will keep the original floor stain a I want something not too dark.
 |
| Dry fit of for the new board |
Next step will be to apply finish to the saw tote and polish the saw blade.

No comments:
Post a Comment