Saturday, November 9, 2019

Record 50 combination plane

Working on my shop drawer I needed a plough plane for the drawer bottom.
For my previous drawer I used a vintage Stanley #45 back from end of 1800's. Since then I got a Record #50 that came from England and was brought to me by my father but did not try it yet... well until today!

I am lucky enough that the plane is complete, all and every pieces are there. Even the user manual is there.

Record #50 Manual
Looks like this one was sold by M Howard Kirby.

This is the original manual showing plane usage and parts.

How to use that combination plane.

Cutters and parts description.


This plane comes with a set of 15 cutters.

The Record #50 set of cutters.
It also comes with short and long rods and with a cam and 2 cutters used for narrow size cutter.

Cam and narrow cutters set.

That plane is in very good condition. It was full of wood dust so I guess it was really used, but the cutters are sharp and do not show much wear.

Dusty plane body.


I took it apart and cleaned it. I used my weapon of choice to clean it, an high tech brush that benefited years of improvement.

A highly evolved brush. The red handle could be
unbreakable tenite but is just... plain ordinary plastic

After brushing it to remove dust I oiled and  waxed all parts and put it back to work.

All pieces back together ready for some shaving.

After a short honing session I tried it with s 1/4" cutter, the one I need for my drawer.

The Record #50 in action.

Some more shaving porn.

I really like the handle on that plane, it fits my hand perfectly. Also it has a more compact form factor than my Stanley #45.
Some says that the metal handle is uncomfortable during cold months in winter. Well I must say that up here if you don't heat your shop in winter you will certainly find everything uncomfortable!

Thursday, November 7, 2019

Another drawer and a real project

After having built my supports for drills and braces I am back to my backlog of work, and the first item that came was to make a drawer like my first one.

But before coming to this, some great news! I received a command from my wife. She asked me to build a new TV stand for her sister new TV. I have a month and a half to complete this as we want to give it to her during Christmas time. After having thought about that for the last few days and changed my mind multiple times, my sick brain came up with this plan:

The TV stand first draft.

I still need to set my ideas things like legs shape and how I will attach them to the apron but this is the design I have in mind. It will be triangular as the stand will go in a corner of her living room. There will be a shelf mid height so she can put her cable receiver and dvd player there.

More to come about this later but now back to the drawer. I like to work on drawers, I feel restful when I work on a drawer, don't ask me why, as I said I have a sick brain.

As usually I started by cutting all pieces to length then marked the face and side to cut the box joins I will use for the assembly. This time I directly saw the waste without making any kerf, in fact I now find this easier and faster. Also for my first drawer I did some cut side by side and chopped out the waste but this time I have something better, now I have a coping saw!

Using the coping saw to cut out the waste.

Using that saw is far quicker than chopping the waste using a chisel. However I need to practice to be able to cut as close as possible to the bottom line to make the cleanup even faster.
I was first using the blade that came with the saw when I got it but soon...

Broken saw blade. That blade did not seem
to be of high quality anyway.

But as I am often planning ahead, I got a set of replacement blades along with the saw.

The replacement blades I got

I have no knowledge about coping saw blades but these look much better than the original blade and cutting far better too.


Waste cleaned

I have been very surprise this time by the density of that poplar board. The previous I used was pretty soft but this one is the total opposite and is quite hard. I was not expecting such a difference.
Nevertheless, after a while I was done with the face joinery.

Joinery for the drawer face done.

Next I will do the same for the rear and I will turn to the drawer bottom but now it is time for a cold one.

Tuesday, November 5, 2019

A man, a plane: Christmas day!

Yesterday, back from a hard working day I found this in my mail:

What the heck is this?

I was wondering what was inside and found this:

A box that contains a box, someone must be kidding me.

So I opened the second box...

A box full of foam, damned it!

Hidden in the middle of the foam I found this:

Someone is sending me a ball of paper, what the...?

But finally, the treasure was revealed:

Santa sent me this shiny Cadillac!

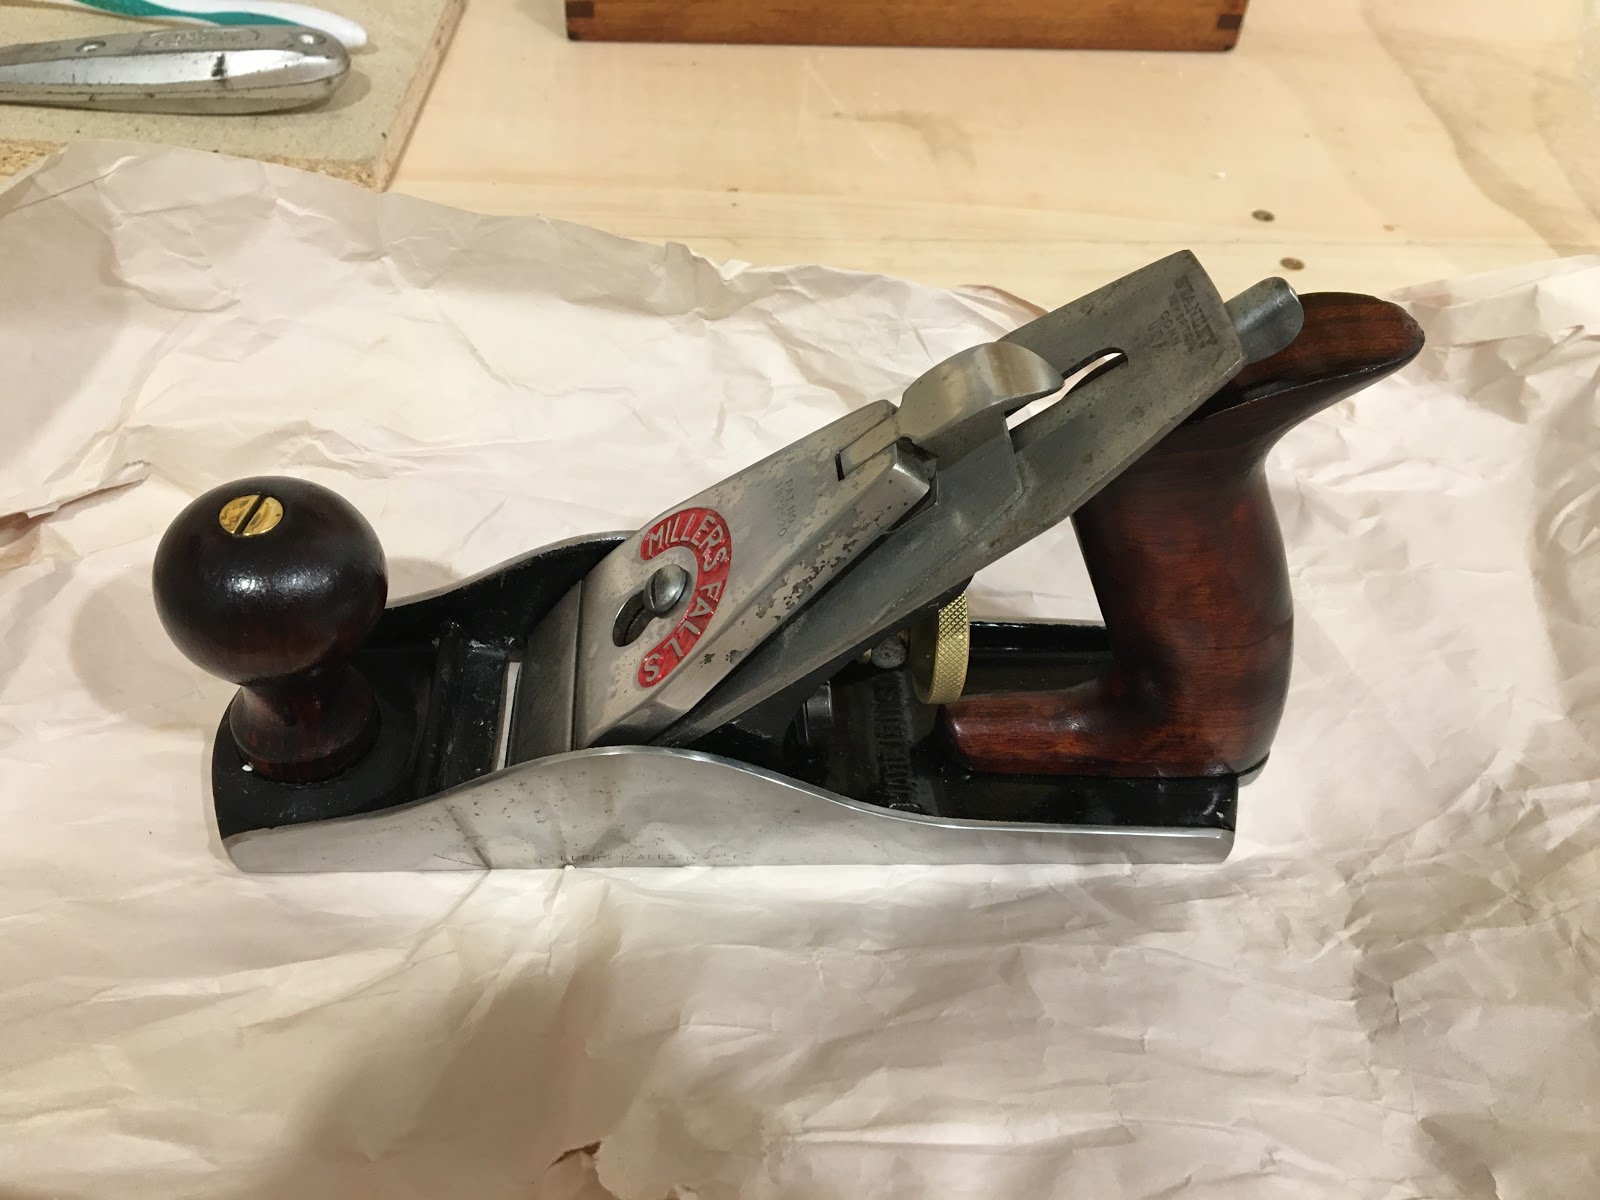
Ok it is not Santa, not really, but still! Ralph, The Accidental Woodworker in his infinite generosity sent me the Millers Falls #9 that he restored. And he did a heck of a job!

Look at that shiny sole!

No need to say how much grateful I am to Ralph for such a gift, it will have a central place in my shop without a doubt!


Some more Millers Falls porn.

Ralph, you are THE man, low hat and much much thank you!

After minor settings I put it to test.

First shavings

And to satisfy everybody's thirst for shavings here is more details (beware Matt, lot of emotions below :) )

Nice thin shaving...
...close up (18+ years old only)


I love my Millers Falls planes!


Monday, November 4, 2019

Block planes

After having cleaned and put back to work my Stanley #12, I did the same with a Stanley #112 that I got a while ago. It was in very good shape and just needed to be cleaned so I rubbed the sole and sides to remove signs of oxidation and clean all the junk from the japanning.
This one was coming with a blade that I sharpened and burnished. I can see a faint Stanley etch on the blade but I do not think it is the original blade for that plane. I will see later to get a new one like for the #12.
I also put 2 coat of shellac on the tote and knob that were showing some sign of fatigue.

Testing the Stanley #112.

After reading a post from Bob, The Valley Woodworker about block planes, I realized that I have a bunch of block planes that need some care. Here is my set:

My block planes set.
From left to right there is a Stanley #220, a Footprint #220B, a Millers Falls #1455B low angle and a small Darex #102. They are all in good shape but definitively need care and sharpening.

Let start with the Darex. This one comes from my grand father toolbox and I would like to keep using it.

The Darex #102 pieces

The blade is somewhat rusty and dull. Not sure what was used to sharpen it but looks like it was filed more than sharpened.

I cleanup the sole and polished it to get its shine back.

A now shiny sole.

Next was to clean the rusty blade. I used my usual green slime and then polished the blade to get it back in better shape.

No more rust.

After some elbow grease it was sharpened to 8000 grit and honed on the leather strop.

A better looking edge.

Time to give it a test run.

Nicely cutting along the grain...
...and across the grain.


Even if this one does not look a great plane, especially with its plastic wheel, I like the small size and I am pretty sure I will make good use of it.

Now looking at the Stanley #220 and Footprint #220B, they are looking very similar.

Footprint on left, Stanley on right.

Size and blade adjustment are exactly the same on both planes. Only visible difference, the Footprint knob is held in place by a screw while for the Stanley the knob is screwed onto the sole (the knob is threaded). Also the Footprint has recessed side for the thumb.

Stanley #220 (left) and Footprint #220B (right) face to face.

When cleaning them I was able to find a major different though... The Footprint sole was severely cupped and I spent easily 15 to 20 minutes grinding it on a plate covered with sandpaper to get the sole flat enough.
After some sharpening fun the two are now ready to do some shavings.

Finally our friend Bob, The Valley Woodworker, previously posted a comment about push drills that I would need. Here are the two I own, both Millers Falls, a #188A and a #100 "Buck Rogers":

Millers Falls #188A (left) and #100 (right) push drills.

The #188A was coming with some bits in the handle while the #100 was complete with box and bits set. They both work fine and I find them very convenient to drill small leading holes for screws or nails.


Friday, November 1, 2019

Drill setup and more

After receiving its final coats of blonde shellac my hand drill support was ready to be installed, what I did yesterday.

The final result...
...looks good to me.


Now that this is done I will look into my next project, but for now it is time to try myself at burnishing the Stanley #12 blade. This is the first time I do that so I was not quite sure about my chance of success. I read everything I could about this, from books or articles written by big shots like Paul Sellers or Christopher Schwarz so time now to jump on it.
I first polished the blade back, then gentle burnish the back side and finally I burnished the edge. I was not really sure about the pressure to apply but read from M. Schwarz that it is like spreading butter on a toast so I went for it.
I put the blade back in the plane, set the blade angle properly and gave it a try on a scrap piece of maple wood. Here what I got:

A nice thin long shaving, this is a special for you Matt!

And to satisfy Matt's (Woodworking in a Tiny Shop) passion for shavings here are some closeup.

Shaving closeup.

... and closer again.
I will need some practice with this plane as I am not used to handling it. The position with one handle on each side of the plane is new to me. Also I need to practice on the plane setup. It is hard to find out if it is properly setup when you do not have any point of comparison (what is a good or a bad setup).
On maple the surface was left really nice, super smooth and silky. However I tried it on pine and the result was really not the same in this softer wood so there is something to improve.


Wednesday, October 30, 2019

Stanley #12 rehab

Waiting for the coat of linseed oil to dry on my hand drill support, I got the time to look at a Stanley #12 cabinet scrapper plane that I got a while ago. I got this one more than 6 months ago but never got a chance to clean it and put it back to work.

First I took it apart to check that no part was broken or unusable.

The Stanley #12 in pieces.

The sole and side were quite oxidized but were showing no damage or excessive rust so I started by cleaning the sole and ensuring it was flat.

Marked the sole with a sharpie before some scrubbing
 on sand paper.

After few strokes the sole was clean and flat enough.

A clean sole.

I applied the same to each side of the plane.

First side...
...second side, all clean.


I then did further cleaning using polishing paste and compound so to remove all and any remaining iron dust.

A shiny sole...
... and a shiny side.


The japanning was in good condition, almost no sign of wear, but was quite dirty so I cleaned it using the same polishing paste.

Quite dirty indeed... Looks that this plane has seen
some real woodworking.

I used the same to clean and polish the brass wheels that were not really looking like brass anymore.

Shiny brass wheel.

The handle was in perfect shape, just dirty so I cleaned it and I had no need to refinish it. With time it got a patina that I really want to keep like it is.

All pieces back together.

That plane did not come with a blade, or more exactly it was coming with a blade that was not really what I would call a blade, so I got this from LV:

A brand new LV blade.

The new blade comes already ground to 45 degree...

The blade is already ground.

... and it fit perfectly in the #12.

The new blade fit perfectly.

I think this will be a very nice plane and I am impatient to try it, but before being able to put it back to work I need to be able to sharpened that blade properly, thing that I never did before. So this will be part of another story boys.

Some more plane porn.